Thursday, November 4, 2010

Food and fun

I came across an interesting article on the notion that food for kids should be different and "fun". 
"...fun food works to clearly carve out and validate the cultural category of childhood by affirming that certain foods are specifically for them, that adult fare does not fulfill children’s particular culinary needs. The culinary “need” here is not about nutrients; it is about fun. Children’s packaged supermarket foods suggest that fun is imperative to the consumption experience. Adult fare (...) bears scant resemblance to the colorful, bizarre and interactive eatertainment found in child-oriented packaged foodstuffs."  -- Charlene Elliot, "Eatertainment and the (re)classification of children's foods" Food, Culture, and Society 13:4.
In other words, the marketers are working hard to sell everyone on the idea that kids' food should be different from adult food, and that the point is entertainment rather than, oh, taste or nutrition. Elliot gives a few reasons to be concerned about this trend; I'm daunted at the task of how to teach Mae to continue to rely on her own hunger cues in the face of such advertising, marketing, and social pressures.

I've always found marketers' promises of "fun" to be often empty-- guess I have to try to help Mae notice this on her own, too, when the time comes.

Wednesday, November 3, 2010

What? Where did I go? Well you might ask. Just have not had time to update with recipes and photos and so on. I have been cooking, though!

Highlights include: buttermilk crackers (lightest, fluffiest crackers I've made yet, although I think Mae prefers the pumpkin ones), chili, a shepard's pie with leftover pork loin, mushroom gravy, and a mashed roasted yam and pumpkin topping.  Gosh, that was good.  Due to Halloween, which marks the onset of my annual empty-calorie food-preparation extravaganza, aka the holiday season, I've also been busy making all sorts of things I can't share with Mae: marshmallows, caramels, butter 'mints' (not minty). 

I need to get back into my recipe posting groove. I'm not quite there yet, I'm afraid. We're hosting Thanksgiving this year, though, so I promise yumminess before then.

Friday, October 22, 2010

Futari-- pumpkin and yam stew for baby led weaning

In our final installment of Pumpkin Week, we've got another East African dish: futari. It's a wonderful stew of coconut milk, pumpkin, and yams. The pumpkin begins to fall apart and thickens the liquid a bit, while the yam retains its integrity a little better and prevents it from being entirely porridge-like. Serious comfort food! Not photogenic, however. No glamour shots this time. No photos at all, in fact: Mae took a late nap and the good light vanished before I could take a photo of her eating this. (There are leftovers; perhaps tomorrow).

There seem to be only one or two recipes for this out there on the web, and I used one of them. It does taste a lot like what I had when I visited Tanzania, so it works for me. The only change I made was to add peanut butter. The recipe I found suggests that if you don't have coconut milk, you can thin down some peanut butter with water and use that as the liquid. But seeing as I do have both, and I feel strongly that they would be yummy together, I added it in addition to the coconut milk. I was right: they are good together.  (Feel free to omit it if you want, though. I won't get mad.)

Futari

1 large onion
2 Tbs oil
2 lb peeled, chopped pumpkin
2 lb peeled, chopped yams/ sweet potatoes
2 cans coconut milk
1/2 tsp cloves
1 tsp. cinnamon
uninhibited spoonful of natural peanut butter
juice of 1 lemon
salt to taste

Heat oil in a large, deep pot. Throw your onions in and let 'em go till they're brown.  Add the cloves and cinnamon, fry briefly. Add remaining ingredients; cover and let simmer until vegetables are tender.

I think this would lend itself well to crock pot preparation, but I haven't tried it yet.

Thursday, October 21, 2010

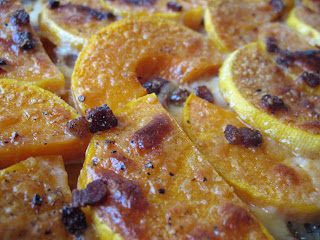
Bacon and cheddar butternut gratin recipe for baby led weaning


Ok, we're venturing a bit further from pumpkin proper here, but any good winter squash or nice fresh sliced pumpkin would work in this.  I use butternut because it's so easy to peel (and yummy).  Just as any vegetable is good roasted, I'd also contend that almost any vegetable is good slathered in cream, surrounded in cheese and, if possible, bacon, then baked.  (Maybe I should try that with beets, but they might prove the exception and just be a waste of good cheese.)(Can't risk wasting cheese).

Bacon and cheddar butternut gratin

2 strips bacon, chopped
1 2lb butternut squash, peeled, seeded, sliced into 1/4 inch thick slices
1/2 c. whipping cream
4 oz. sharp white cheddar, cubed
1/2 c. grated parmesan

Grease up a large casserole dish (the shallow rectangular kind). Preheat oven to 400.  Fry up the bacon, drain on paper towels once it's nice and crispy. In the casserole, array half of the squash slices.  Scatter the cubed cheddar over it. Cover with the remaining squash slices, douse them liberally in the cream, sprinkle the bacon and parmesan over and finish it with some freshly grated black pepper. Bake for 30 minutes until it's all brown and bubbly and irresistable.

The quantities of all the ingredients are highly adjustable-- more or less of anything. To tell the truth, I never measure with this one.   

Wednesday, October 20, 2010

Cuminseed, Poppy, and Coriander Pumpkin Crackers

 Now 9 months old, Mae is getting much better at eating crackers! It's funny, she's been eating solid foods for three months now, so I shouldn't be surprised that she's making progress-- but since she doesn't have any teeth, I guess I wasn't expecting a huge change in how well she eats certain foods until she sprouted some more chompers. But she still just has the two, and yet is getting better at eating.  She now has the technique down for sucking on these crispy crackers until they are moist enough to break up and swallow.  It takes her a little while, but she perseveres (and it keeps her out of trouble for a few minutes).

These pumpkin crackers don't taste all that pumpkiny-- just a little.  I used banana squash puree; perhaps canned pumpkin puree would give a stronger flavor. In any case, they're a good backdrop for a number of flavors, from sweet pumpkin spices to more the savory.  I chose to go with the savory-- coriander, poppyseed, and cuminseed. Their lovely golden color is a bonus-- I think I know what I'll use when it's time to finally unleash my faux-Goldfish crackers.

Pumpkin Crackers

2 c. whole wheat pastry flour
2 tsp baking powder
1/2 c. butter
1 c. winter squash or pumpkin puree
cumin seeds
poppy seeds
ground coriander

Preheat oven to 375.  In a bowl, mix together the flour and baking powder.  Cut in the butter with a pastry blender or with your fingers-- you want small pieces, no larger than peas.  Mix in the pumpkin.  Start the process with a spoon, but finish by kneading it in gently with your hands, as the pumpkin needs to get squooshed around to mix in properly-- don't overwork the dough!  Mix until just combined-- it'll be the consistency of a medium-stiff cookie dough. (Note: I used fresh squash puree, so it was a bit wetter than canned pumpkin. Add a little milk if you have difficulty incorporating all of the flour into the dough).  Divide in half, and form each half into a flattened disk.  If you're confident that you didn't overmix, you can roll it out right away-- otherwise, wrap in plastic wrap and refrigerate for at least a half hour just to be on the safe side.  Generously flour a baking parchment or a silpat, and roll out one of the disks as thinly as you can-- 1/16th of an inch of possible, and no more than 1/8 of an inch. Sprinkle the dough with ground coriander, poppyseeds, and cumin seeds-- roll over them gently with the rolling pin to get them to stick. Cut the dough into rectangles using a pizza cutter or, if you're feeling fancy, deploy thematically appropriate cookie cutters (I wouldn't try removing the extra dough from around the shapes, as it's a bit delicate-- leave them in situ and pop them out once they're baked).

                                                                        Just before baking.

Bake for 12-15 minutes.  The trickiest part of this is getting them done just right-- underdone and they're a bit chewey and relatively tough; overdone and they're, well, burnt. I usually take them out at 12 minutes, remove the crackers from the edges that are starting to brown, and return the rest to the oven for 2 minutes, let them brown a bit, repeat the procedure until all of the ones in the center are done properly.  Break them apart once they're cool.  Repeat the procedure with the second disk of dough. Devour.
                                               
Variation: Instead of the seeds, add 1/2 tsp cinnamon, 1/4 tsp nutmeg, and 1/4 tsp ginger into the flour mixture. 

Rubbed sage or curry might also be nice mixed into the dough, but I haven't tried them yet. If you do it, let me know how it turns out!

Tuesday, October 19, 2010

Savory pumpkin custard

You might need to use a loaded spoon for this one, as it's not very pick-uppable. It's definitely a messy one to give a baby (a 3 on the messiness scale).  But it's so good, it's worth all that.  This custard's got a lovely golden color, silky-smooth texture, and delicate flavor. Although I call it pumpkin, in truth I used roasted and pureed Hubbard squash, and I credit a lot of the success of this dish to the intrinsic deliciousness of the squash. The better your squash, the better the final product will be. Butternut would work fine, but I'd stay away from canned pumpkin.

Savory pumpkin custard

3 egg yolks
1/2 c. whipping cream
1/2 c. winter squash puree
1 sprig rosemary
1 large clove of garlic, sliced
freshly ground black pepper

Preheat your oven to 300.  In a small saucepan, heat the cream to a gentle simmer, and add the rosemary, garlic, and pepper. Turn off the heat, cover, and let sit for 10 minutes, then strain into a small bowl and let the cream cool.  Discard the spices. When it's cooled, whisk in the pumpkin and egg yolks. Pour into ramekins (I used two shallow and wide ones, but do whatever you like; be aware that you may have to adjust the cooking time a little depending on the size of dish you use). Set in a roasting pan and fill the pan with water to reach about halfway up the sides of the custard dishes. Bake until just set (if there's a little wiggle in a small area in the center, they're done), about 15 minutes. Serve warm.

She doesn't look like she's having much fun, but she ate about half of one ramekin all by herself. This is early on in the process-- later, the custard covered the nose and entire chin.

Monday, October 18, 2010

Muffin Monday-- Pumpkin Spice Muffin recipe for infants

It's pumpkin week!

We made our annual pilgramage to my favorite pumpkin patch recently, and now I've got to use up the 2 quarts or so of pumpkin puree I have in the freezer to make room for this year's crop (it's a disease, I know...now leave me alone).  Well, not pumpkins, actually-- I find most pumpkins to be flavorless, whether from a can or from a fresh pie pumpkin. I'm a winter squash fanatic-- the big blue-grey Hubbard being my squash of choice.  The pulp of a Hubbard is dry and so sweet I can eat it freshly roasted with no seasoning whatsoever. Delicious. And it makes any recipe you use it in just that much more delicious, too.  (Of course, to get the dadgum thing open, you have to toss it off the front stoop and bust it open on the sidewalk. It's the safest way. Trust me.) (Yes, I said "dadgum". What of it?)

Where was I going with this? Oh yeah, muffins. This is based on my favorite, favorite pumpkin bread recipe-- I've reduced it in size to make a manageable quantity of muffins, added in whole wheat pastry flour for a bit of nutrition and a tender crumb, reduced the sugar dramatically, left out the salt.  It's still delicious, but much less like a cupcake than the original recipe was. (Though if cupcakes are what you're wanting, you could hardly do better than trying the original recipe).

Awesomely autumnal muffin pan ("cakelet" pan, to be precise) thanks to Mae's Grammy, who always keeps us eating in style.

Pumpkin Spice Muffins

1/2 c. sugar
1 c. oil
3 eggs
2 cups pumpkin puree
1 c. All Purpose flour
2 c. whole wheat pastry flour
1 tsp cloves
1 tsp cinnamon
1 tsp nutmeg
1 tsp baking soda
1/2 tsp baking powder
1 c. chopped walnuts (optional)

Preheat your oven to 350 and grease up your mini-muffin pan. In a large bowl, whisk together the sugar, oil, eggs, and pumpkin. In a smaller bowl, stir together the dry ingredients. Stir the dry ingredients into the wet ingredients until just combined, and fold in the walnuts if you're using them.  Fill your muffin tins 3/4 full, and bake for 12-15 minutes.

Monday, October 4, 2010

Hiatus

Well, Mae's dad is traveling a lot and I can barely find time to eat a piece of toast, much less try new recipes and blog about them. So I'll be on a brief hiatus until his return early next week. If I get lucky I may get a chance to post something-- maybe even a recipe-- but no promises. Just hang tight, I'll be back in action soon.  Just in time for...Pumpkin Week! Oh yeah!

Friday, October 1, 2010

Beets, at last

What have I got against beets, you ask? Well, I'll tell you: I am another victim of the canned beet. My mother used to buy them and eat them straight out of the jar. I don't think she even rinsed them off. I shudder at the very memory of the smell.  (She used to do that with asparagus, too, and I was well into adulthood before I discovered that I actually do like asparagus when it isn't pulled straight out of a can). (No offense, Mom.)

I gave the beets I bought plenty of time to go bad in the fridge, but they never did (root vegetables, go figure-- perhaps I should have left them out on the counter), so I had time to research the best way to prepare them. I read this thread in its entirety, and learned that you can eat them raw, you can eat them pickled, you can steam them, you can roast them. If you roast them, you should roast them at a high temperature. Either that or a low temperature. And you should put olive oil on them. Or not. And you should peel them. Or not.

So I peeled one, and washed the rest and stuck them in the crock pot for a few hours on high, just to see what would happen.  What happened is they became very soft, and the outside was a bit caramelized. Very promising! I took a small bite of one and liked it. Then I took a larger bite and did not. I probably should have gotten smaller beets.

Anyway, since they were soft and sweet, I thought I'd let Mae have a go at them. This was her verdict:


This is the first time she has made this face.  The funny thing is, she went on to eat most of what was there anyway, which just goes to demonstrate how much she likes putting stuff in her mouth.  I have 4 1/2 beets left, so I'm going to offer them to her again tomorrow and the next day. Who knows, maybe they'll grow on her. And as for me, I'm going to try some of the other preparations I've seen: tossed with balsamic vinegar. With salt, maybe. Perhaps with goat cheese. I'm going to put these beets through their paces. I may even buy some more, smaller ones and have a go at them before I conclude once and for all that I just don't like beets.  No one will be able to say I didn't give beets a chance.

Thursday, September 30, 2010

Sweet Potatoes Mayai recipe for baby-led weaning

A few years ago I got to visit Tanzania for a couple of months. A popular street food was "chips mayai"-- deep-fried chips with an egg (the 'yai', plural 'mayai') broken over them, resulting in a tangled, greasy-good mass of chip and egg, best slathered with pilipili (pepper) sauce. This recipe was inspired by that, but is less greasy and involves sweet potatoes rather than fries.  It's a good general formula that could be readily adapted to whatever veggies you have on hand-- potatoes, squash. Well, really just potatoes or squash. Maybe carrots. Still! That's pretty versatile!

My main discovery is that if you grate things directly into your frying pan, they cook quickly and you save time on cleanup. I am gonna be doing this with everything from now on. Well, really just potatoes or squash. Maybe carrots. Still! I eat a lot of potatoes and squash! So it's a useful technique!

Sweet potatoes mayai

2 Tbs olive oil
2 medium sweet potatoes
1/2 onion
1 egg
ground black pepper to taste
1 tsp dried thyme
your favorite pepper sauce

Get the olive oil heating up in your trusty skillet over medium-high heat.  Using the coarsest side of your grater, grate in the onion. (Watch your fingers!). Give it a stir. The quickly grate in the sweet potatoes. Stir in the black pepper and thyme.  Let cook until potato is cooked through, stirring with restraint (you want browned bits).  It really only takes a few minutes. When the veggies are cooked, break your egg over the middle of the pile. Cook like you would any fried egg, flipping halfway through (aim it onto some unincorporated veggies if you can). 

Let some cool for the baby, and eat yours with added salt and hot sauce. Yum!

Perfect for those practicing their pincer grip, or those not quite ready for that can grab a big hunk with egg and still get some veggies, too.

Wednesday, September 29, 2010

French Silk Pie Recipe


It was my birthday recently, and the chard recipe I was going to write about today was a bust. So no baby recipes today-- instead, I bring you my favorite favorite pie (decidedly not infant-friendly, except perhaps with respect to its fat content).

My mom made me cakes when I was a kid, but occasionally (very occasionally) she also made this pie. One year she asked what kind of cake I wanted, and upon reflection, I said, "You know, that pie was really good. Cake is good, but that pie is better."  And I've had French Silk Pie on my birthday ever since. 

No candles, for the following reason: the recipe seldom came out just right for her. She was cooking it in unusual conditions for the first few years (long story short, we lived on a sailboat and the refrigeration system wasn't what it could have been).  And she always did it with a hand mixer (the only kind we had). It consistently came out a bit runny. Every now and again it would almost set up right, just often enough to lend support to our assumption that it was something about how she was doing it that was causing the problem. Nowadays, Mae's Dad makes it for me-- he fixed the recipe (the proportions were just off a bit), and it sets up perfectly every time.  Of course, if I'm lucky enough to spend my birthday with my mom, she makes it her way, and I enjoy licking the runny filling off the plate. Something about that just seems right. :)

Here's the (corrected) version:

 French Silk Pie

3/4 c. sugar
1/4 lb butter, softened
2 eggs (we used the pasteurized egg stuff in a carton and it works beautifully)
2 oz unsweetened chocolate, melted and cooled a bit
3/4 tsp vanilla

Add eggs to sugar one at a time. Beat 5 minutes after each.  Add the melted chocolate and beat for 5 minutes. Add the vanilla. Turn it out into a baked pie crust and refrigerate a few hours until it's set.

Tuesday, September 28, 2010

Kibbeh(-esque) Shepard's Pie recipe for baby-led weaning


Okay, I may as well tell you up front, I have never had real kibbeh. I've just read about it. It captured my imagination and I just had to give it a try. Middle-Eastern grandmothers the world over would weep if they heard me describe this dish as kibbeh, so I won't. But it is kibbeh-ish (kibboid? kibbehsque?), with its spiced beef filling and bulgur-based topping. Just simplified a bit, and made with spices that I have on hand.  Maybe someday I'll try one of the more labor-intensive variations (dumplings!), but for now, this is more my speed.

Mess-wise, it's a 3.  It definitely required more than three wipes to clean it all up. Between the bulgur and the ground beef, there are lots of little tiny bits for Mae to drop onto her lap, into the highchair, and onto the floor.  Quite a bit of it went into her mouth, too, though, so I'd call it a success.

Kibbeh(-esque) Shepard's Pie

1 1/2 lbs. ground beef (aka 'mince')
1 c. bulgur (cracked wheat)
2 Tbs flour
1/2 onion, pureed in a food processor
1 tsp zaatar seasoning
1 tsp cinnamon
1 tsp allspice
1/4 tsp ginger
1/4 tsp cloves
black pepper, salt to taste
1/2 c. pine nuts, chopped

Put your bulgur in a medium bowl and cover it with boiling water. Let it sit a while-- at least 15 minutes. Meanwhile, brown the beef in a skillet, mixing in the cinnamon, allspice, ginger, cloves, black pepper, and pine nuts.  When it's cooked, turn a portion out into a little casserole dish for the baby, and add a bit of salt to the remaining beef if you like, and put it into a larger casserole dish.

Return your attention to the bulgur: pour it into a fine sieve and press down on it to squeeze out as much water as possible. Put it back in the bowl, mix in the onion, zaatar, and flour. It should clump together after the flour is added; use a bit more if necessary. Turn this out on top of the beef in the casserole pans and pat it down firmly. Bake at 350 for 20-30 minutes (perhaps a bit less for the baby casserole). It should be a bit brown around the edges when it's done.

Monday, September 27, 2010

Muffin Monday-- Recipe for Apple-Peanut Butter Muffins


My craving for satisfying apple muffins was left unrequited with last week's muffin, so I decided to have another go this week.  I've got a new recipe for you, with a bit of a twist-- peanut butter! Apples and peanut butter being one of my go-to snacks throughout the fall and winter.  My appreciation for the combo has been enhanced by my finally buying-- and devouring in record time-- natural peanut butter. It actually tastes like peanuts! Who knew?

We introduced peanut butter to Mae several weeks ago, and she appears to take it just fine-- no allergies here, thank goodness.  So this muffin is a good way for her to enjoy this flavor combo, too (since I'm still pretty nervous about chunks of raw apple).

The recipe is based on these muffins, with a few changes to make up for the fact that I omitted most (but not all) of the sugar.  I added the apples, spices, and the peanut butter. The result is light, fluffy, and moist, which is exactly what I was going for. Win! This time I also remembered to add salt to the second half of the batter for some adult-friendly muffins. The salt-free ones were not bad, but they still benefitted some from the inclusion of salt. Just take care not to overstir the batter when you add the it, or the muffins will end up with the texture of little rubber lumps.

Apple-Peanut Butter Muffins

1 c. AP flour
1/2 c. whole wheat flour
1/4 c. sugar
1 1/2 tsp baking powder
1/4 tsp baking soda
1/4 c. canola oil
1/2 c. milk
1/2 c. sour cream
1 egg 1 tsp vanilla
1 tsp cinnamon
1/2 tsp cardamom
1 c. cinnamon stewed apples, peeled and lightly mashed
natural peanut butter (no sugar or salt added)

Preheat your oven to 350, and prep your mini-muffin tins.
In a large bowl, mix together the flours, sugar, baking powder, baking soda, and spices. In a smaller bowl, whisk together the oil, milk, sour cream, egg, and vanilla. Gently stir the wet ingredients into the dry ingredients, then fold in the mashed apples.

Fill your muffin tins, then with a fingertip dipped in flour to prevent sticking, make little indentations in the center of each proto-muffin.  Add a 1/2 tsp or so dollop of the peanut butter.  (If that's too fussy, just spread peanut butter on 'em when it's time to eat 'em. That'll work, too.)

Bake for 12-15 minutes each. Makes 3 dozen mini-muffins.

Saturday, September 25, 2010

My battle with beets, continued.

I just can't seem to be able to bring myself to cook those beets. Today at the farmer's market, I saw some other beets, and thought, "Those look so much better! I should probably buy those and use them instead of the ones I got the other day. But I don't have enough money left. Darn".  That's how it's going. I need some inspiration, here, folks. Do you like beets? What's your favorite preparation (aside from borscht. I am NOT doing bright red soup to give to Mae)?

Friday, September 24, 2010

Cinnamon-flavored black-eyed peas

I love black-eyed peas. Love them, love them. For dinner last night, I made this recipe (reproduced below for your convenience). The only adaptations I made were to use a yellow onion instead of red, and to leave out the cilantro (because I didn't have any). And to not add the salt until the very end after I had set some aside for Mae, of course.

This is not a tidy recipe. I give it a 3 on the messiness scale. Mae enjoyed practicing her pincer grip on the peas, but it manages to be a substance that both smears around and drops in small bits to the floor. It's a good time to use a plastic food-catching mat, if you have one.  I forgot, and regretted it.


Cinnamon-flavored black-eyed peas

1 c. dried black-eyed peas
1/2 small yellow onion, diced
3 Tbs canola oil
4 garlic cloves
2 Tbs tomato paste
1/2 tsp cayenne
1/4 tsp turmeric
2 cinnamon sticks
2 bay leaves
2 cardamom pods

Thoroughly rinse the peas in water, and bring them to a boil in 3 cups of water. Simmer 35-45 minutes, or until tender. Heat 1 Tbs of the oil in a skillet and saute the onion until it's nice and brown. In a blender, puree the browned onion and garlic cloves with 1/4 c. water. Add tomato paste, ground spices, and another 1/2 c. water and blend. Put the rest of your oil in a skillet over medium-high heat; add the cinnamon, cardamom, and bay leaves. Cook for about 30 seconds, then add the spice slurry from the blender. Turn the heat down to low and simmer a bit. It'll thicken a little. Stir in the black-eyed peas, and simmer another 10 minutes or so. Remove the whole spices (good luck finding the cardamom), set some peas aside for the little one, and add salt to taste for the adult portion. Garnish with some minced cilantro if you have it on hand.  They suggest serving it over rice, but we thought it was fine on its own.

Thursday, September 23, 2010

Spiced Roasted Eggplant recipe


I suppose we're reaching the end of the season for these lovely little eggplants. I couldn't resist buying them and roasting them up again, this time with spices.  I must admit that Mae hasn't had a taste yet; she got sleepy and went to bed before she could try them. Lunch tomorrow, then. 

Spiced Roasted Eggplant

8 Fairytale eggplant, or 1 small italian eggplant
2 Tbs butter
1 Tbs olive oil
1 tsp coriander
1/2 tsp cumin
1/2 tsp turmeric
1/4 tsp cloves
1/4 tsp cinnamon
1/4 tsp cardamom
1-2 Tbs balsamic vinegar

Preheat your oven to 400. Compile the ground spices into one small bowl, and prepare your eggplant by trimming and cutting them in half lengthwise (or into batons if you're using a larger eggplant). Put them in a bowl and toss them with the olive oil. In an oven-safe skillet (perhaps your trusty cast iron skillet!), melt the butter. Add the spices and stir quickly for a few seconds until the spices become fragrant, then pour the mixture over the eggplant. Stir it up, and return the eggplant to the skillet. Put it in the oven and roast for about a half hour, stirring them up partway through.  Just before taking them out, sprinkle the balsamic vinegar over the vegetables and return them to the oven for 2-3 minutes to reduce the vinegar a bit.

Update: At lunch. These are definitely a 3 on the messiness scale. Well-cooked eggplant is very smeary!

Wednesday, September 22, 2010

Carrot Souffle recipe for baby-led weaning


Here's a good one for the younger set-- nice and soft (perhaps a bit messy), but still pick-uppable and yummy. Don't be put off by the fact that it's called a souffle-- it isn't really, since it gets some of its puff from baking powder rather than egg whites. This recipe is a long-time favorite of my in-laws-- Mae's Grammy makes it whenever the family gets together. It's easy enough for a weeknight dinner, but fancy enough for special occasions, too.  She uses canned carrots, gives it all a whirl in the food processor, and pops it in the oven. It'd be good with other veggies, too-- parsnips, winter squash, and sweet potatoes come to mind (I have tried it with winter squash-- see the variation discussed below).  The original calls for a few tablespoons of brown sugar, but I didn't miss it in the little one she baked for Mae when we visited them last week. She baked it in a 1/2 (or possibly 3/4?) cup ramekin, and Mae polished it all off (along with some kugel, roast pork, and stewed plums and apples).

Carrot Souffle

1 lb carrots, cooked and mashed (or canned)
3-4 eggs
4 Tbs flour
4 Tbs melted butter
1 tsp baking powder
1 tsp vanilla

If you're using canned carrots, drain them. Then pour everything into a food processor and give it a whirl until it's nice and smooth. Pour it into a greased baking dish-- give it some room to grow, it'll puff up marvelously-- and bake at 350 for 40-50 minutes.

Variation: Use pureed winter squash or pumpkin (I don't think canned pumpkin would be very good, but then, I'm obsessed with winter squash and a bit biased. More on that come October), and add 1/4 tsp nutmeg and 1/2 tsp cinnamon.  The souffle in the picture is winter squash (Hubbard, to be precise).

Messiness rating: 3 (3+ wipe clean-up)

Tuesday, September 21, 2010

Well, I did it, I bought some beets. I'm committed now to this whole beet-consumption lark. What to make, what to make...?

Quick sugar free skillet plum-orange jam recipe for baby-led weaning


These little prune plums at the farmer's market can be put to good use as a quick and easy sugar-free 'jam' for on toast. Any kind of plums will do, though.

Sugar-free orange-plum jam with cardamom

4 small plums
1/4 c. freshly squeezed orange juice
pinch of cardamom powder

Pit the plums and put them in a small skillet or saucepan along with the orange juice and the cardamom.  You can peel the plums if you want, but I find that once they get cooking, the skins pull away easily enough.  Go easy on the cardamom-- the flavor will intensify as the mixture cooks down. Anyway, just let it all simmer, mashing up the plums and stirring as it all simmers down to a lovely, thick, fruity sauce. When it's thick enough to mound on a spoon, you're done.  It makes a couple of tablespoons.

Monday, September 20, 2010

Muffin Monday-- "Hello, My Name is ______" Muffins recipe

Just realized I can use Helvetica here. Awesome!

Anyhow, we're traveling, visiting Mae's Grammy and Grandpa, so no pictures this time. 

Bit of a muffin fail, too. Somewhat.  I have this basic, utterly plain muffin recipe, to which you add stuff of your choosing to render them yummy. The basic recipe was a success, but my particular variation this time did not exactly open up new vistas of muffiny goodness. I have an idea of what went wrong. I'll go into that below, but here's the fill-in-the-blank muffin recipe:

"Hello, My Name Is _____" Muffins

2 c. flour
1 1/2 tsp. baking powder
2 eggs
1/4 c. melted butter
3/4 c. milk
1/2 tsp salt (optional)

Preheat your oven to 375. In a medium bowl, stir together the flour and baking powder. In a small bowl, whisk together the eggs, milk, butter. Stir the wet ingredients into the dry ingredients, fold in your additional custom ingredients (see below), and bake for 12-15 minutes.

I used 1/2 c. whole wheat flour and 1 1/2 cups all-purpose flour. To this, I added: 1 c. oats, 1/3 c. apple butter, 1/4 tsp cinnamon, ginger, and cloves, and 1 diced apple. I stirred the oats and spices into the flour mixture, and the apple butter into the egg/milk mixture. Added the diced apple at the end. The oats were a success, and the apple chunks were nice, but you couldn't really taste the apple butter or spices. The result was a bit bland. More than a bit. Quite. Quite bland. Very, I would go so far as to say. I should have added at least a half teaspoon of the spices, probably more. Plus, this really needs salt. I should have baked Mae's dozen and then folded in some salt to make the remainder adult-friendly. But I didn't, and they taste flat. Salted butter helps, but does not redeem. 

The muffin substrate was good, though, texturally speaking, and I'll definitely be having another go at these. You can stir in cheese, herbs, dried fruit, fresh fruit, use a mixture of flours and grains, etc. etc. Lots of ways to change these up.

Mae thought it was pretty good, even if I was not impressed with my additions. Meanwhile, my quest for perfect apple muffins continues. Stay tuned.

Friday, September 17, 2010

Whole wheat crackers recipe-- baby finger food


I wanted to try making crackers because, by the time Mae is entering what is normally the Goldfish cracker-or Cheerio- munching stage, I want to have come up with and mastered the production of a healthier, tastier version lighter in sodium and preservatives. And somehow get her so thoroughly hooked on them that she has no interest in Goldfish. Oh, I don't really know if it can be done (or if I would even want that result if I truly understood the rate of cracker production I'd have to keep up to meet the demand), but it's worth a try.

Turns out, crackers aren't that hard. They're like a cross between pie crust and biscuit. I am a past master of both the pie crust and the biscuit, so they should be entirely within the scope of my abilities.  There are a few different types out there-- you've got the kind with yeast, the kind with baking powder or soda, and the kind with no leavening at all. This one is in the baking soda camp. Rest assured I'll be trying others (cf my obsession with exploring every variation on a theme), and will let you know which is the best.

This particular recipe has a lovely, nutty flavor from the whole wheat pastry flour. I was a bit unsure how Mae would do with these (lack of teeth not making crackers an obviously good choice), but she did very well-- the zucchini hummus moistened it a bit, and she gummed them until they were swallowable. Probably I'll wait until she's a bit older before giving them to her on a regular basis, though.

Whole Wheat Crackers

2 c. whole wheat pastry flour
1/2 tsp baking powder
1/4 c. butter, cold
1/2 c. milk

Mix together the flour and baking powder; cut in the butter like you would if you were making pie crust or biscuits (using a pastry blender, two butterknives, or your fingers, cut it into tiny little pieces until it's well-distributed in the flour).  Gently stir in the milk just until it'll form a ball; divide the dough in half, flatten the balls into disks, wrap them in plastic wrap, and refrigerate at least 30 minutes or as long as a day.  When you're ready to bake, roll out one of the balls on a floured Silpat (or parchment paper).  Roll it as thinly and evenly as you can. Lots of people use a pasta machine for this-- that's a great idea if you happen to have one. If like me, you don't, just do your best-- you want as close to 1/16th of an inch as you can get, as evenly across the surface as you can manage.  Transfer the Silpat to a baking sheet, and cut the dough into shapes-- you can use a pizza cutter, or if you're feeling fancy and have a bit of time on your hands, use a cookie cutter. Bake at 375 degrees, 10-12 minutes. Start checking at 10-- if they're getting brown around the edges, pull it out and remove the browning ones from the pan. Pop the rest back in until they're starting to brown too. If you leave them all in there until the center is brown, the edges will be burnt for sure.  Be careful! Let cool, then devour.

Thursday, September 16, 2010

Canned tomato taste test

The folks at Serious Eats have done a canned tomato taste test...might be of interest if you want to make tomato soup but don't want to mess about with making your own puree....

A miscalculation

Whoops! I accidentally posted today's recipe yesterday. And I don't have another one! So go reread about the zucchini 'hummus', and come back tomorrow! Tomorrow, the crackers recipe as promised.

Wednesday, September 15, 2010

Roasted zucchini 'hummus' recipe for baby-led weaning


'Hummus' in quotes because I'm not sure what the necessary and sufficient conditions for being hummus are, but probably this doesn't really meet them. It's more of a family-resemblance sort of relationship. It's got garlic, it's got tahini, and you can dip it or spread it.  I just thought it might be good, and I was right. Mae agrees.  That cracker it's sitting on? Easier than you might think. Recipe for those tomorrow.

Roasted zucchini 'hummus'

4 medium zucchini (~6 inches)
4 cloves garlic
2 Tbs olive oil+ additional if desired
black pepper
1 Tbs tahini
1/2 tsp sesame oil
juice of 1/2 a lemon

Heat your oven to 400. Quarter the zucchini lengthwise, and then cut into 1/2 inch pieces. In a bowl, toss them with the olive oil and garlic cloves, grind black pepper over them, and then turn 'em out onto a sheet pan (or trust iron skillet!). Roast them for 30 minutes, turning halfway through. When they're nice and soft and browned, they're ready. Let them cool a bit, then dump them in a blender with the remaining ingredients. Blend until reasonably smooth.  Mine still had bits of skin visible, and I thought that was fine; you do what you like.  Spread it on crackers, pita, toast, rice cakes, eat it with a spoon or, if it comes down to it (and it well may!) with your fingers.

Roast beef

Roast beef (perhaps technically pot roast, but we always called it roast beef and so that's what I'm going to continue to call it, so there!)  is one of those dishes from my childhood that I remember us having on a regular basis. I just loved it. It's what started my enduring love affair with gravy, really. It took me a while after technically entering adulthood before I tried it myself, and then only in a crockpot. I had never understood the reasoning behind the various instructions my mother would leave me with if I were left at home to babysit the roast while she went out-- start it hot, turn down the temperature, make sure it's covered make sure there's water on it...cover it with foil, take the foil off...what?  And we never really could predict accurately when it would be done-- sometimes it went too long and was dry, sometimes it wasn't quite ready by the time we were ready to eat dinner, and was still tough. Most of the time it was juicy and tender, but there always seemed to be an element of luck to the process. As the years have passed, I've finally acquired a theory of meat, and finally felt ready to try it on my own-- just me and the oven, no Crockpot needed. (I do love my Crockpot, don't get me wrong-- it's just the principle of the thing.)

Simple roast beef

3 lb rump roast
an onion
1/2 c. water

Preheat your oven to 400.  Put the roast in a roasting pan (find one with a cover so you don't have to mess with foil like my mom always did), and salt and pepper it.  I know I'm trying to be all no-salt for Mae, but I really think a roast needs it, so to minimize her salt intake, I give her meat from the inside of the roast. (It also happens that I really like the browned bits from the outside. Isn't it nice when things work out like this?).

Ok, so you've salted and peppered it. Put it in the oven for 30 minutes to get it started browning. Meanwhile, thinly slice your onion. After the half hour, turn the heat down to 200, add the onions and the water to the roasting pan.  Then let 'er go a while. Honestly I'm still not clear on how long it should take-- I think I leave it in for 3-4 hours. I start checking it after 2 hours, and pull it out when it starts to pull away easily when you stick it with a fork.  I like it falling-apart tender.

Save those juices and make yourself some gravy.

Tuesday, September 14, 2010

Quick Tomato Bisque recipe


I've been on a quest for the perfect tomato soup for some time now. I've been pursuing my goal in a haphazard and lazy way, admittedly, but it still counts as a quest. What I want is a soup that pairs well with a grilled cheese sandwich or saltine crackers, has the flavor of a good bistro tomato bisque, but the easy prep of a can of Campbell's.  I made fresh soups, and tried a canning recipe. They were delicious, but not quite what I wanted (particularly from the 'quick prep' angle). They weren't as smooth as I wanted, the flavors not quite as rich as I was hoping for.  In the end, the answer was far simpler than I'd imagined.  Well, sort of. Let me explain....

It started when I spied the box of paste tomatoes for canning at the farmer's market. I had gotten a food mill for Christmas, and this is what I had been waiting all year to use it for. I made some tomato sauce, canned it up, and had a little left over in the pan. So I made a sort of soup-- just threw in a little garlic powder, pepper, dried basil, and cream.  And it was goooood.  So the next week, I got me another box of paste tomatoes, and made sauce again, this time added a little garlic powder and dried basil to each jar. Voila! Perfect canned tomato soup! Just add cream upon opening.  I'm a bit embarrassed that the perfect soup turned out to be so simple. But perhaps I should have expected that.

So you can do this a couple of different ways. 1) can your own tomato soup concentrate from fresh tomatoes, like I did; 2) Make a fresh puree of tomatoes and use that to make the soup (I did this, too, and 2 lbs of tomatoes got me about 2 1/4 c. puree, which reduced to about 1 1/2 cups of soup); 3) buy a can of tomato sauce and add the spices and cream when you're ready to eat you some soup.  If you do that, just make sure it's the best quality sodium-free sauce you can find, as I suspect the success of the whole thing depends on the quality of the tomato sauce.  I also am able use my homegrown and dried basil, and home dried garlic (I love my dehydrator!), and I'm sure that helps as well. I know that's not an option for most, but just use the freshest dried ingredients you can.

Making the sauce

If you want to make the puree yourself, quarter your tomatoes and heat them in a pan. As I mentioned, 2 pounds of fresh tomatoes got me about a cup and a half of finished soup. Crush them up a bit as they come up to heat. Soon they'll get all juicy and begin to break down. Simmer them for about 10 minutes until they're all nice and soft. Then put them through a food mill or force them through a sieve. Discard the seeds and peels, and return the resulting puree to a saucepan. Simmer it for a while to thicken-- let it go until it's a little thicker than you want the resulting soup to be.  There you go. Now you have puree. On to the soup...

Quick Tomato Bisque

2c. of tomato puree (homemade or canned)
1 tsp dried powdered garlic
1 tsp crumbled dried basil
black pepper to taste
cream

Heat the puree in a pan and stir in the spices. Bring to a simmer, and stir in cream to taste. Enjoy!

Mae, looking like a little tomato vampire.

Monday, September 13, 2010

Muffin Monday: Browned butter orange oat muffins with banana-orange cream-cheese filling

This past spring, I finally discovered the joy that is browned butter when I made Mae's dad a batch of Nigella Lawson's burnt butter cupcakes for his birthday. I vowed that I would make a batch of browned butter to keep in a vat in the fridge and use in everything. I haven't actually done that (yet), and it's probably for the best. But how could I resist working it into a muffin? These are toasty goodness- the browned butter, toasted oatmeal, and toasted pecans in the filling. Enjoy!

Banana-orange cream cheese filling/spread

2 small ripe bananas
1/2 c. orange juice
2 whole cloves
4 oz. cream cheese, cut into pieces
1/4 c. finely chopped toasted pecans (optional)

Chop or break the bananas into a few large chunks and put them together with the orange juice into a small skillet. Add the cloves. Turn up heat to medium high. As the bananas soften with cooking, mush them up, and cook until the mixture is reduced and thickened. Turn off the heat, remove the cloves, and stir in the cream cheese, then the pecans. Remove from heat and let cool. This can be made a day or two in advance.  It actually makes about twice as much as you need for the muffins, but it's so good you'll want extra (for spreading on the muffins, or toast, or pancakes, or....).

Browned butter orange oat muffins

1 stick butter
1 c. buttermilk
1 egg
finely grated zest of 1 orange
1 c. rolled oats
1 c. All Purpose flour
1 1/2 tsp. baking powder
 1/2 tsp baking soda

Preheat your oven to 350 and grease up your mini-muffin tins.

First, brown your butter. In a small pan (8 inches wide and at least an inch deep, because it'll foam a lot), melt the butter over medium heat. Let it continue to heat-- it'll foam at first, then gradually begin to darken. Let it go until it's so dark you think, "Oh no, it's ruined!", then carefully strain it into a heatproof receptacle (pyrex is good). I assure you that unless it actually bursts into flames, you won't have ruined it (unless you forget to strain it, in which case you'll have nasty burnt sludge in your muffins, and you don't want that). Let it cool.  There won't be quite a 1/2 cup anymore, but that's fine.


In a small bowl, whisk together the cooled butter, the buttermilk, egg, and orange zest.

Next, toast your oats.  Go ahead and use the same pan you browned the butter in (after it's cooled a bit so you don't instantly burn your oats). Heat them over medium heat, stirring frequently, until they're beginning to turn golden. Take them off the heat and let them cool for a few minutes, then whisk them into the liquid mixture.

In a medium bowl, whisk together the flour, baking powder, and baking soda. Stir the liquid ingredients into the dry ingredients until just combined.  Fill the muffin tins halfway; add a 1/2 tsp of the filling mixture in the center of the batter, then cover with a little more of the batter. Bake 10-12 minutes. (If you don't want to be bothered with filling them, you can spread it on just like frosting on a cupcake. That would be stylish!)

Friday, September 10, 2010

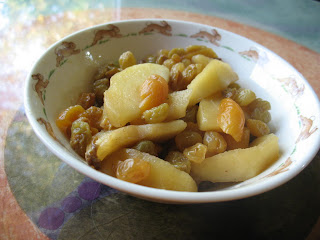
Chamomile Apple Compote Recipe


Mae has just in the past couple of weeks gotten the hang of her pincer grip, and is beginning to be able to handle smaller things. This opens up a brave new world of handy foodstuffs. Like dried fruit. She did fine with plain dried cranberries, but I just thought she might enjoy it more if they were softened a bit.  But how? Most dried fruit already has a bit of sugar added, so I didn't want to make a sugar syrup the way most compotes call for. Plain water was too boring. I tried stewing the dried fruit in some orange juice, and while this was delicious, it was still pretty sweet. An infusion of chamomile flowers proved to be a happy medium, resulting in a light, fresh-tasting syrup once the dried fruit and apples are stewed together with the chamomile 'tea'.  It goes very well with some toast, or stirred into yogurt in the morning.

Chamomile Apple Compote

1 Tbs chamomile flowers (or 2 teabags)
1/2 c. water
1 apple, peeled, cored, sliced
1/3 c. golden raisins
5 dried apricots, chopped

BRing the water to a boil and pour over the chamomile petals. Let steep 5-10 minutes, then strain into a small saucepan. Add the apple, raisins, and apricots. Simmer until apples are soft and liquid is mostly absorbed.


(Hah, no, she isn't eating that well out of a bowl, nor is she eating that much all at once. I took the bowl away for its own safety after I got the picture.)

Thursday, September 9, 2010

Farinata recipe for baby-led weaning


Ok, this is one where I won't try to tell you that the no-salt version is as good as the salty version. You will want to make two of these, one for the big salt-loving people, and one for the very small, unsalty people who won't know the difference anyway.  Farinata is a highly tasty, flatbreadlike substance concocted from chickpea flour. It has the virtues of being a) very quick and easy to throw together, b) delicious, c) pretty healthy (chick peas! High in iron, fiber, and folate, among other things), d) gluten-free, if you're into that sort of thing, and e) delicious!  So it's worth doing a salt-free one for the little one even though that one will be just good, not OMG amazing like the fully-salted one. 

I used my trusty cast-iron skillets-- I have a little tiny 6-inch one one that I never know what to do with. As it turns out, it's perfect for a batch of baby farinata. If you don't have a well-seasoned cast iron skillet, then a nonstick pizza pan or even cake pan will do just fine.  Just make sure it's non-stick-- because this stuff is wont to stick in the worst way.

Farinata

1 1/3 c. chickpea flour
1 1 /3 c. water
5 1/2 Tbs olive oil
2 tsp minced rosemary
lots of freshly ground black pepper
(3/4 tsp. salt)

Preheat your oven to 450.  Go ahead and put your pans in to preheat along with it-- ideally a 10 inch one for the big people, and a 6 inch one for the baby's portion.  Whisk together the chickpea flour, water, and 2 1/2 Tbs. of the olive oil.  Let it sit there while the oven is heating, or up to 12 hours ahead of time. Right before you're ready to bake, whisk in the black pepper and rosemary. Hold off on the salt for now.

Take your pans out-- little one first-- pour in another tablespoon of olive oil and swirl it around to coat.  Pour in about 2/3 cup of the batter.  It'll sizzle! Now do the big one-- quickly whisk the salt into the batter, add the remaining 2 Tbs of olive oil to the 10" pan, pour in the batter. Sizzle! Now pop them both in the oven, and bake 10-15 minutes. It's often recommended that the broiler be used to brown them up nicely on top-- I found that mine browned without that, but go for it if you like the sound of it. But do make sure they're browned-- you want that flour cooked all the way through.

Cut it into wedges and eat it while it's warm. It's not as good once it's cold, but if you have leftovers, you can reheat them in a hot oven to good effect.

Wednesday, September 8, 2010

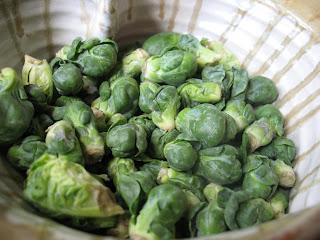
Roasted Brussels Sprouts recipe for baby led weaning

At the farmer's market on Saturday I stumbled across the cutest little brussels sprouts and decided that if I was ever to make good on my promise to give them another try, now would be the time. So I bought a box of them and headed home, wondering where such a reckless path might lead me.  It led me, it turns out, to deliciousness.


Going on my observation that all vegetables are delicious roasted, I decided to give it a go with these, too. The generalization still stands: brussels sprouts, too, are good roasted. Of course, I didn't want to salt them, so I made a balsamic vinegar reduction and crossed my fingers hoping that it would provide the flavor needed to make them irresistable even to a skeptic such as myself. It did. Browned and a little bit crunchy on the outside, tender enough at the stem end that Mae could gum them without a problem, and drizzled in sweet and tangy balsamic vinegar...yeah, I'll be making these again.  Next week, in fact, if I can find the brussels sprouts at the market again.


Roasted Brussels Sprouts with Balsamic Vinegar

1/2 lb of the smallest brussels sprouts you can find (1/2 inch)
1/4 c. olive oil
black pepper
1/4 c. balsamic vinegar
1 small bay leaf
pinch of cinnamon

Preheat your oven to 400. In a bowl, toss the brussels sprouts with the oil and grind black pepper to taste over it. Roast for 20 minutes, giving it a good stir halfway through. They should be brown and tender when they're ready.  Meanwhile, in a small saucepan, simmer the balsamic vinegar together with the bay leaf and cinnamon. Let it go until it's reduced by half.  When the sprouts are ready, return them to their bowl and toss them with the now-thickened vinegar.

Tuesday, September 7, 2010

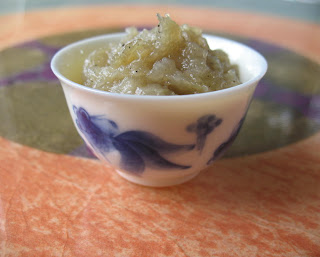
Quick sugar-free ginger-pear butter recipe for babies (or anyone, really)


I believe I've mentioned my ongoing obsession with jam making. Every time a new fruit turns up at the farmer's market, I buy a few pounds of it and turn it into jam. The pantry is really filling up, since I'm also the only one around who eats jam with any regularity.  I'm not ready to give any to Mae yet since it's full of sugar. (Mmm, sugar.)  It seems unfortunate that her mother is reguarly turning out delicious fruit spreads, and she can't have any. She has been getting one thing: some sugar-free apple butter we got at a country store in Nashville, Indiana. Fruit butters are a puree of fruit that has been cooked down until thick and spreadable. They usually have much less sugar than do jams-- perhaps half the amount or less.  Indeed, with certain fruits, you can get away with not adding any sugar at all.  The natural sweetness of the fruit becomes concentrated so you don't really need much extra sugar, if any.

The problem with butters is that it takes so long to cook them down, it's really an all-day affair.   But you can just make a very small amount for immediate consumption.  Like, say, one pear's worth.  It cooks down fairly quickly, you just have a little to store for a short time, you don't have to worry about buying a ton of fruit, spending 12 hours boiling it down, processing the jars for long-term storage, etc., etc. And you can experiment with flavors more freely without worrying that you're wasting a ton of fruit on something you might not care for in the end.

The technique is simple. Get some nice, juicy, ripe fruit. The best fruits for butters are pulpy, as opposed to juicy (for example, oranges would make a lousy butter, whereas apples, pears, plums are perfect for this application).  Just mash the fruit up in a skillet, add whatever spices you want, stir it as the liquid cooks off. When it's nice and thick, it's done.

 Quick skillet ginger-pear butter

1 ripe pear (should not be crispy, but soft and juicy)
a squeeze of lemon juice
1/4-1/2 tsp grated fresh ginger (1/2 tsp makes it very zingy!)
drop of vanilla extract
(optional: 1 tsp brown sugar)

Peel and core the pear. Chop it up in a few big pieces, put it in a small skillet over medium heat. Toss it with the lemon juice and mash it up good. Stir in the ginger, and vanilla. (And the teaspoon of sugar if you've decide to use it). Turn the heat down to low. Stir frequently-- more and more frequently the longer it's been on. You'll need to stir it more or less constantly toward the end or it may scorch.  After about 5 minutes, you should have a nice sauce-- you could stop there and mix it into yogurt or eat it with a spoon. If you want the spread, though, keep going and keep stirring another 5-10 minutes, or until it's of a thick, spreadable consistency (or until, in common jammaking parlance, it "will mound on a spoon").  It cooks down a lot. The one pear yielded about 2 tablespoons of spread.  Store it in the fridge until it's all gone. That shouldn't take long.

If you want to make more, go ahead and double or triple it, but use a larger skillet to cook it in so there's still plenty of surface area to help speed the evaporation along.

Messiness rating: 1 (1-2 wipe clean-up)

Monday, September 6, 2010

Muffin Monday


Ok, I admit this one isn't really for the babies, but I made it for a potluck and am so proud of myself, I have to share.  I couldn't decide whether to make my tomato, basil, and sweet corn pasta salad, or cupcakes. So I decided to compromise.  I give you...[drumroll]... basil sweet corn mini-muffins with tomato-chevre 'frosting'!  All the cute of a mini cupcake, but with a flavorful little punch of savory.

It could be adapted for babies easily enough-- leave out most of the salt, sugar, and possibly the whole corn (which, um, tends to pass right on through little digestive systems), and it would be fine. Mind you, if you use 1 tsp of salt in the whole thing, that's 2325 mg of sodium (according to NutritionData.com), but the recipe makes 54 mini-muffins, so only about 43mg per muffin (before adding the cheese in). Just sayin'.

Basil sweet corn muffins

1 stick butter, chilled
1 3/4 c. cornmeal
1 1/4 c. all purpose flour
1/4 c. sugar
1 Tbs baking powder
1 tsp salt
1/2 tsp baking soda
1 1/2 c. buttermilk
3 eggs
1 1/2 c. frozen corn, thawed
1/2 c. finely chopped basil

Preheat your oven to 400, and grease up some mini-muffin tins.

In a large bowl, mix together the dry ingredients. With a pastry blender or a knife, work in the butter until it's all cut into pea-sized bits or smaller. then go at it with your hands and work it in some more.  In a smaller bowl, whisk together the eggs and buttermilk.  Stir these into the dry ingredients, then stir in the corn and basil.  Fill your muffin tins and bake about 10 minutes, until a knife stuck in one comes out clean.  Turn them out on a rack and let them cool.  Makes 4 1/2 dozen.

Tomato-Chevre 'frosting'

This is a bit more approximate, and I didn't take close measurements when I was making it.  So start with small amounts of the spices and work your way up to the amount you think tastes good.

12 oz. goat cheese (Capriole Farms chevre if you can get it!)
12 oz. cream cheese
tomato paste-- the better part of one of those little cans, maybe 6 Tbs total
~1 1/2 tsp or so of powdered garlic
~1 1/2 tsp sun dried tomato powder
~1/2 tsp. white pepper
salt to taste
~ 1/4 c. heavy cream

Let the cheese come to room temperature, mash it up good in a medium bowl. With vigor and enthusiasm, mix in your spices and tomato paste. Gradually stir in the cream. With a hand mixer, beat the mixture on high until light and fluffy, adding more cream to lighten as necessary. The texture should be light and fluffy and easily spreadable.  Pipe it onto the corn muffins and garnish with toasted pine nuts or a sprig of basil.

I promise my muffin for next week won't involve basil or garlic.

Friday, September 3, 2010

Grilled chicken with tomatillo sauce-- recipe for baby led weaning


I bought some tomatillos at the farmer's market last weekend. I've never actually managed* to make anything with fresh tomatillos before-- I'd only had green salsa sorts of things at Tex-Mex places.  Let me tell you, the fresh ones are so different! They have a natural sweetness to them that I hadn't expected based on my prior limitd experience.  I will be buying more next week, and we will be broiling us up a mess of this sauce to freeze for later.

Anyway, this recipe is adapted from one I found on epicurious. We blackened the tomatillos and peppers on the grill, used non-spicy peppers, and grilled the chicken breasts too while we were at it. I also left the salt out until the sauce was done and I could set some aside for Mae.  I put aside a couple of tablespoons for her, to go with her own little piece of non-salted chicken we had grilled and cut up for her. It wasn't enough. I mean, there was enough chicken, but she wanted to eat the sauce by the spoonful.  Mae knows good stuff when she tastes it.

Grilled Chicken with Tomatillo Sauce

1 lb husked tomatillos
2 small sweet peppers (we used half a pimento and a little red one of unidentified variety that I thought was going to be hot but really wasn't. Probably a quarter cup of peppers altogether, and we agreed that a bit more would be even better)
2 boneless skinless chicken breasts
1 Tbs olive oil
1 onion, chopped fine
3 cloves garlic, minced
1/2 c. fresh cilantro, chopped
salt to taste

Grill the tomatillos and peppers on a hot grill until soft and skins are beginning to blacken a bit. Under the broiler works, too. When they're done, let them cool, remove the stems, and toss them in a blender to puree them.  Get the chicken breasts on the grill-- cook till brown and mostly done.

Saute the onions and garlic. I caramelized mine-- not strictly necessary, but I do recommend it. Add the blended tomatillo mixture to the pan and simmer briefly. Stir in the cilantro. At this point, set aside some sauce for the baby and then add salt to the rest if you want. Then add the chicken breasts to the pan and simmer until they're cooked through.

* I say 'managed', because I have bought them before, but then waffled about what to make out of them until they went bad. I am ashamed.  Stop yelling at me!

Thursday, September 2, 2010

Carrot ginger pancakes recipe for baby led weaning


I tend to go through brief fits of enthusiasm for certain types of food, and explore all the variations of it I can think of until the obsession wanes on its own. This usually happens with sweets (there was the marshmallow phase, a fudge phase, a pate de fruit phase, an herb-infused syrup phase...), but I've also had prolonged obsessions with waffles, granola, and jam (this one is ongoing, and as far as I can tell will end only when I run out of pantry space or Mae's dad asks me not to buy any more canning jars). Right now, my attention has shifted to pancakes, due to (1) the fact that I've been eating a lot of these pancakes in the mornings because there's usually already a batch in the freezer, and I've begun to crave variety, and (2) this thread on eGullet.  It was the description of the apple pancakes that got me thinking about vegetables grated into pancakes. Not in a sneaky way, but in a "hey, that is good!" sort of way. A carrot cake sort of way.

 And so the carrot pancakes were born, although I ended up going with a slightly more savory profile than carrot cake.  You could carrot-cakify them further by throwing in a pinch of cloves, nutmeg, and allspice, as well as some ground toasted walnuts. Or you could render them more savory by leaving out the cinnamon and including some cumin and coriander. And perhaps some scallion. But I think they're pretty good as-is. 

Carrot-ginger pancakes

1 egg
1/4 c. milk
2 Tbs oil
1/2 tsp. finely grated fresh gingerroot
1 c. coarsely grated carrot
1/2 c. all-purpose flour
1 tsp. baking powder
1/2 tsp. ground ginger
1/2 tsp. cinnamon

In one bowl, whisk together the egg, milk, oil, and grated ginger.  In another bowl, toss together the remaining ingredients. Get your skillet heating up over medium-high heat and brush it with some oil. Pour the wet ingredients into the flour/carrot mixture, and stir until just combined. Spoon the batter out onto the hot griddle-- I made these a bit smaller than my usual pancakes, about 3 inches across. Flip them when the bubbles show in the middle, and cook until nice and brown on both sides.  If you want to add some salt to the adult ones, just make the pancakes for the baby first and then throw a pinch of salt into the remaining batter.

Wednesday, September 1, 2010

Garam masala roasted sweet potato fries recipe

I have come to believe that for any given vegetable, there's no better preparation than just tossing it with olive oil and roasting it. I'm beginning to wonder why I would ever want to do anything else, unless said vegetable is meant to be a vehicle for cheese, in which case you toss it with cream and cheese and then roast it. But I digress. 

I love love love roasted sweet potatoes. I like them roasted with just salt and pepper, I like them roasted with curry powder, I like them roasted with chile powder...and on and on. But I believe I have found my all-time favorite flavor to complement the sweet potato: garam masala, a warm Indian spice blend that involves cinnamon, cardamom, clove, nutmeg, mace, chile, cumin, coriander, bay... So much flavor when combined with the browned sweet potato that I honestly did not miss the salt. I know people say that all the time, but usually, I am the sort of person who misses the salt. So it really means something, coming from me.

And, oh yeah, you can give them to your little one, too. This is a relatively tidy one for Mae-- easy to grab and eat, yet nice and soft. They keep rather well in the fridge for a couple of days, and as such lend themselves handily to grabbing if you're eating out. Case in point: some friends invited us over for dinner, and we snagged a leftover container of these (and some roasted eggplant) on our way out the door. Although we brought the plastic mat for under the highchair, we may as well not have, because nothing got dropped. I mean, her face and hands were orange (and eggplanty), but the mess was largely contained. And most of it made it into her mouth.  So go ahead and make a large batch, is what I'm saying.

2 large sweet potatoes
1/4 c. olive oil
1 Tbs. garam masala

Preheat your oven to 400.  Peel the potatoes and cut them into 1/2 inch by about 2 inch long sticks. In a large bowl, toss them with the olive oil, and then the garam masala. Spread them on a large sheet pan and bake for 35-40 minutes, until tender and beginning to brown. Give them a stir halfway through and they'll be the better for it.

Messiness rating: 1 (1-2 wipes)